In this guide, you’ll learn how to connect your Gmail account to Snov.io using SMTP credentials.
Snov.io lets you connect your own business or personal mailbox and send email campaigns through your email provider’s servers to have total control over your sender account’s performance.
SMTP is reliable for sending large volumes of emails and provides secure authentication. For this reason, we recommend adding your Gmail to Snov.io via an SMTP connection.
The process of connecting involves these steps:
1) Create an app password
Let’s get started by setting up a special app password for your Gmail account.
- Open Security page.
- Scroll down to How you sign in to Google section.
Note: Ensure that 2-Step Verification is enabled. If it is disabled, the option for app passwords will not be available.
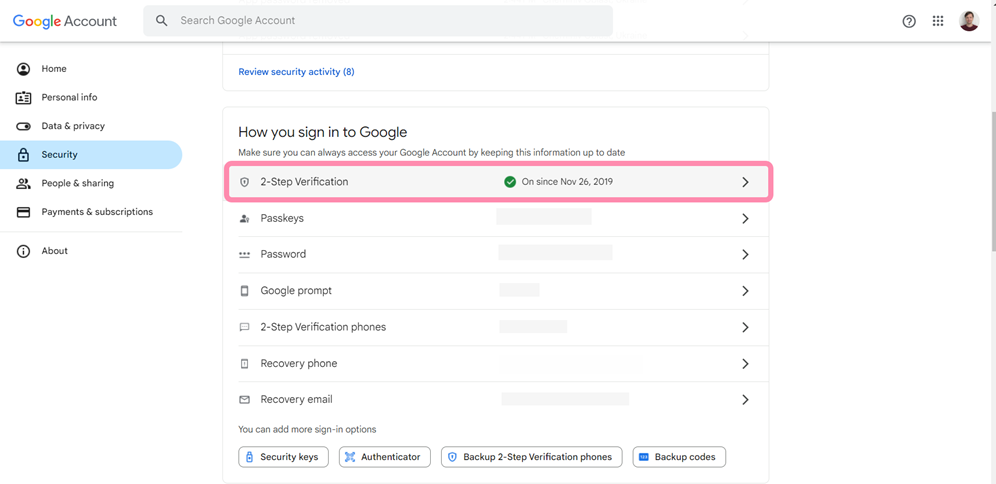
- Click the 2-Step Verification option.
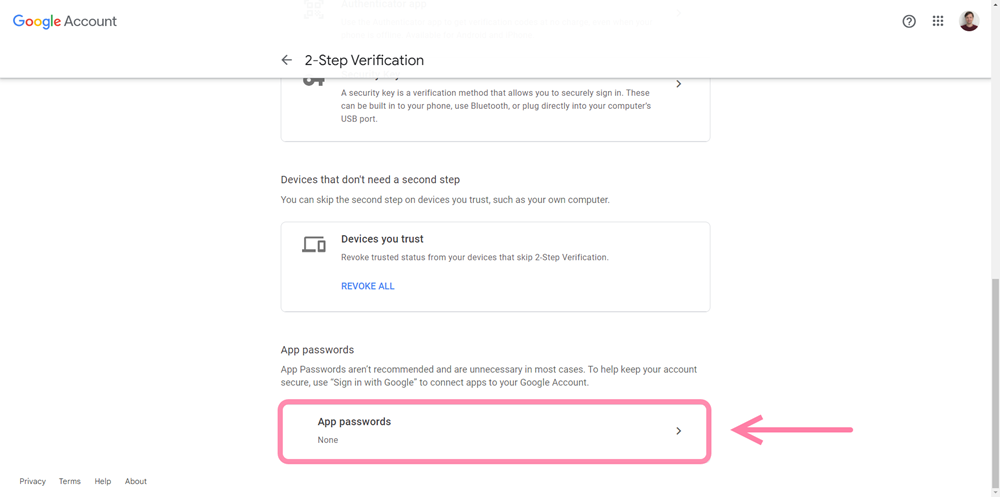
- On the next screen, scroll to the bottom of the page and click on App passwords.
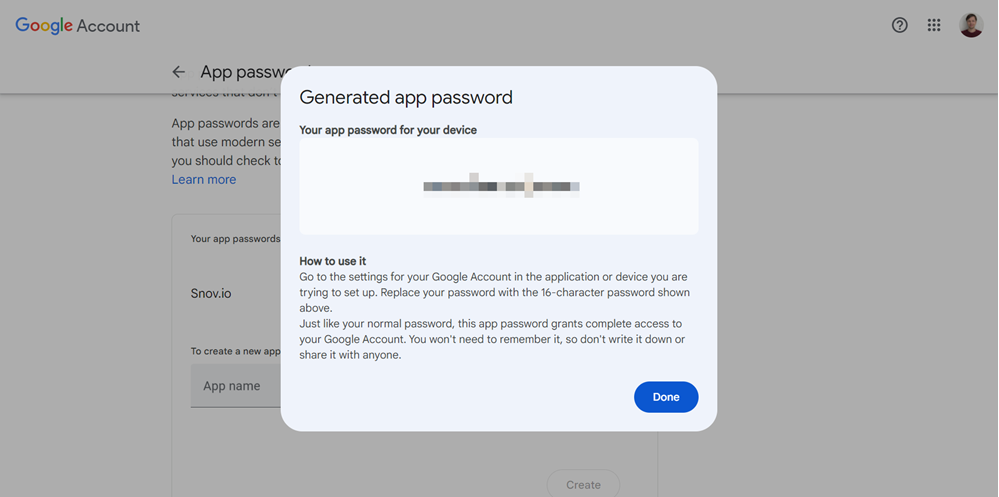
In the App name field, type Snov.io (or anything you prefer) and click on Create.
Copy the generated app password. You will need to enter it in your email account settings in the next step.
2) Add a new email account
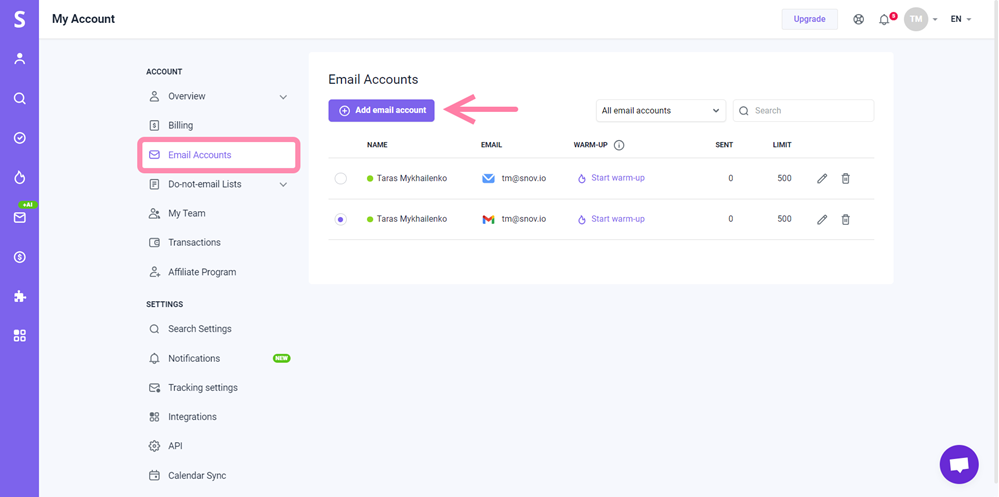
Go to the Email Accounts page.
Click + Add email account button and choose Gmail (SMTP) to setup a new mailbox.
3) Enter SMTP and IMAP settings
In the SMTP section, enter your SMTP credentials and the provider’s server settings for sending emails.
Refer to the explainer table below for guidance on the information you need to enter in each mandatory field.
| Field | Explainer |
| From name | This is your sender name. |
| From email | This is your sender email address. Enter the address associated with your Gmail account.
To set your Gmail alias address as the “From email”, follow these steps:
Please note that you can only add alias addresses that are associated with your primary Gmail account to the “From email” field. |
| App password | Enter the “app password” created for your Gmail account. |
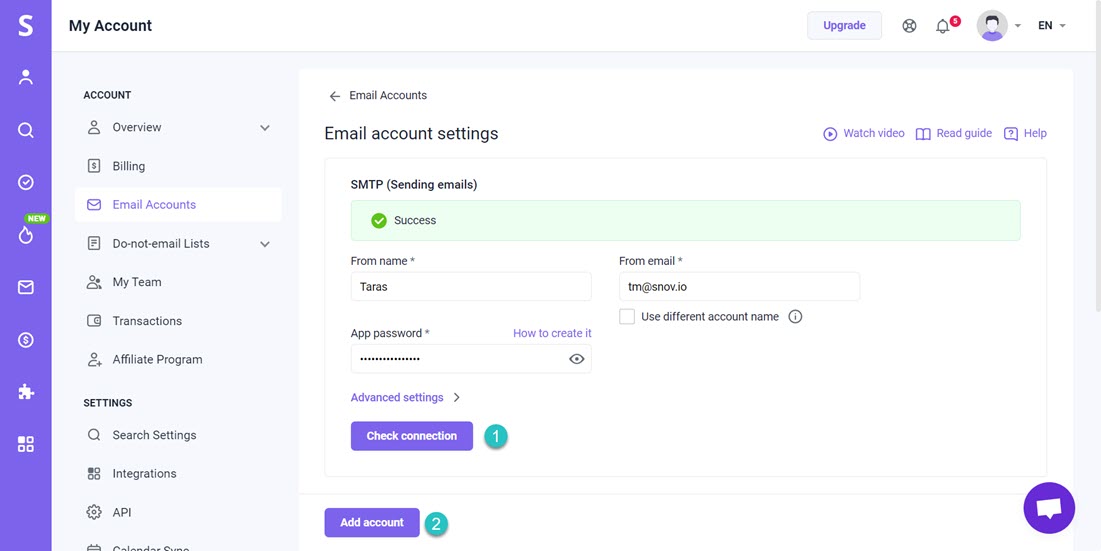
4) Check connection
Complete your email account setup by testing the connection after entering all required settings.
Click the Check connection button (1).
Snov.io will send you the test email with the subject “Testing your new email with Snov.io” confirming the successful connection.
Click Add account to save it (2).
5) Set your daily sending limit
You can set how many emails this email account sends per day.
After reaching the Messages per day limit, it will stop sending emails and continue the next day.

You can also adjust the Delay between emails. This represents the interval in seconds between each email sent in your campaigns.
Learn more about daily sending limits in Snov.io –>
What’s next:
Check other optional email account settings to improve your email performance.
Once you’ve linked your Gmail account with Snov.io, you can choose it as the sender for your email campaign.
Learn how to launch drip campaigns ⇒
FAQs and troubleshooting:
If you encounter connection errors (Password not accepted or IMAP error) while connecting your account, follow these steps:
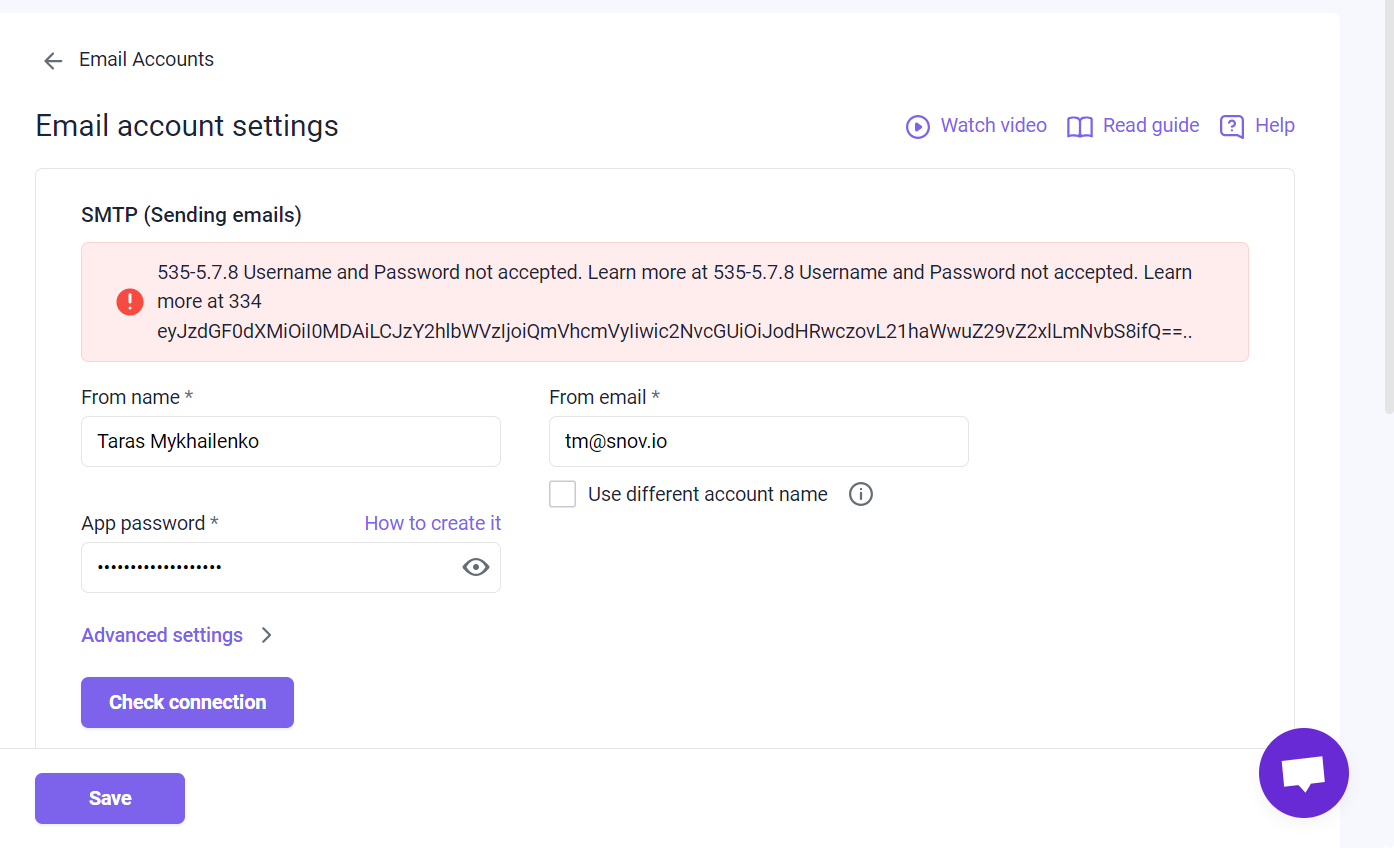
1. Retry to connect and create a new app password
If the connection fails initially, wait 5-10 minutes and try again. If you’re unable to connect to Snov.io with the app password you generated, create a new app password and replace it in your settings.
Note that if you ever change your regular Gmail password, your old app password will no longer work and you’ll need to create a new one.
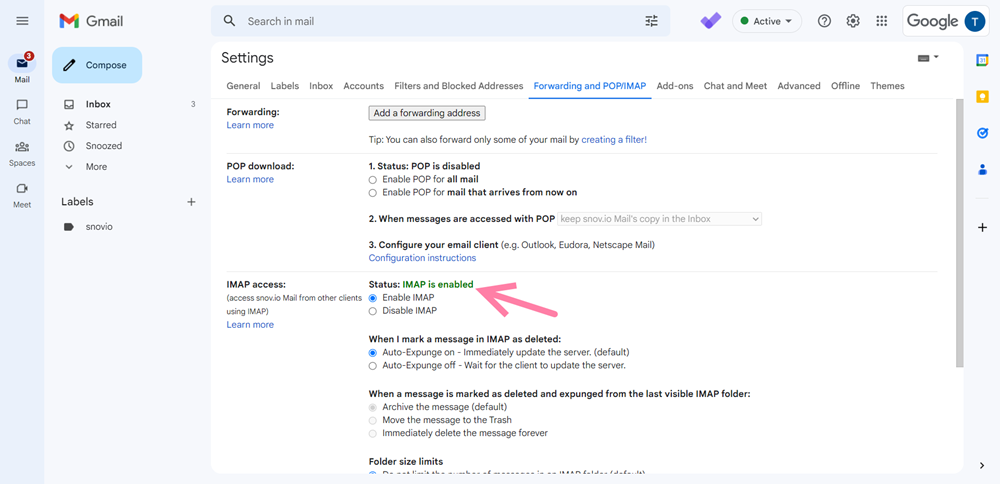
2. Check IMAP status in Gmail
Let’s make sure IMAP is turned on in your Gmail settings. It’s crucial for a successful connection.
Open your Gmail account.
Click on the gear icon in the top-right corner.
Select See all settings.
Now, go to the Forwarding and POP/IMAP tab.
Scroll down until you see the IMAP access section.
Confirm that IMAP is enabled.
If you’re still experiencing connection issues, don’t hesitate to reach out to our Customer Care team. You can contact us at help@snov.io or use our live chat for assistance.


Sorry about that 😢
How can we improve it?